Give your student one magazine. Give them 2 minutes to cut out as many phrases as they can.
At the end of 2 minutes, tell them to put the phrases together to make a story.
Note: if your kids can't read, then give them 2 minutes to cut out as many pictures as they can. At the end of 2 minutes, tell them to put the pictures together to make a story.
Thursday, April 30, 2009
Wednesday, April 29, 2009
Kool Krazy Kaleidoscopes - Solutions
We had some magnificent entries this week.
Moomintroll and Snufkin both began with a layer of shiny clear plastic with a layer of black paper. The clear plastic on the inside, they both folded triangular prisms and secured them with tape. They then made pockets from two layers of clear plastic and put in snipped coloured plastic pieces, beads and sequins. They tapped the edges of the pockets securely and attached them onto one end of their prisms. They could have left it there but Snufkin decided to place her prism snugly inside a cardboard tube so that she could easily turn the kaleidoscope to change the view. She also added a peep hole in order to block any extra light from the viewing end. Moomintroll kept the rather pleasing prism shape for his kaleidoscope and even his peep hole is triangular. He took some rather lovely pictures of its not-at-all-disappointing show. Awesome work guys!


Austen found a plastic tube and put the beads on one end of the tube and covered the top with a plastic sheet and put a rubber band around it to hold it in place. Then, Austen cut up tissue paper into small squares and put these into the tube with plastic over the end and taped it to the tube. Finally, Austen took the black piece of paper and rolled it around the tube and taped it in place. Tremendous work! You should be proud.


Although Orca and Alce say they had trouble getting started, they did an amazing job and should be proud for sticking with it!


Zee really worked hard on this challenge, revising his kaleidoscope 3 times. He also made a magnificent video that you can see here. Zee, this is one of your best ones yet! Great job.


Thursday, April 23, 2009
Week Thirty-Five -- Kaleidoscopes
Use the following materials to make your own kaleidoscope.
clear plastic
a clear plastic sheet protector (it is doable if you don't have this)
black paper
a cardboard tube ( pringles can, toilet paper roll, paper towel roll)
glue or tape
pins or paperclips
a rubberband
colored tissue paper
small beads or buttons
scissors
When you are done, you can read about how to make kaleidoscopes here. Did you do something similar?
And, you can read about the world's largest kaleidoscope here.
If you haven't gone to the web recently, please check it out. There are some new fun things there, including a new ongoing challenge.
Wednesday, April 22, 2009
Giant Geometrics Solutions -- Week Thirty-Four
Orca and Alce joined us for the first time this week, creating some amazing structures -- a cube/triangular prism and a square/pyramid. You should be extremely proud! To read more about their process, go here.


Once again, Snufkin and Moomintroll did a magnificent job. Snufkin displayed hers by hanging it like an objet d'art from the lampstand. Moomintroll made a 3D crown-like shape, which his cat is modelling. He then made a larger structure that balanced nicely on the edge of the armchair.


Zee also did an absolutely marvelous job with his giant geometric shapes. I hope you are smiling proudly Zee! You can read more about his process here.


Thursday, April 16, 2009
Week Thirty-Four -- Geometrical Shapes
Place a box/bag of straws and a box of paperclips on the table. Tell your students to make the largest geometrical shape that they can (preferably 3D). Remind them that there are more shapes than a simple cube. They may use scissors in construction but not the solution.
Monday, April 13, 2009

Thursday, April 9, 2009
Week Thirty-Three -- Snow Machines
Wishing there was still snow on the ground? Well,
Using tongs, 2 forks, a ruler, two pencils, rip up some paper and make some 'snowballs'. YOU MAY NOT TOUCH THE PAPER WITH YOUR HANDS!
For an added challenge, create a snowball launcher from a rubberband, 2 paperclips,tongs, and a pencil. Launch the snowballs but remember YOU MAY NOT TOUCH THE PAPER WITH YOUR HANDS!. Send in pictures or video.
Tuesday, April 7, 2009
Sticky Solutions -- Week Thirty-Two
.JPG)


Thursday, April 2, 2009
Week Thirty-Two -- Rice Crispy Art
Make some rice crispy treats or similar marshmallow cereal treat then tell your students to make an animal using the rice crispies. When you're done, check this out.
Tuesday, March 31, 2009
Week Thirty-One Solutions: Houses and Huts
Once again, Snufkin and Moomintroll beat everyone to the punch! You guys should be proud of your creative solutions! They're magnificent. Snufkin drew templates for her house on paper and cut the windows and doors, before assembling it . She used the band-aids and paper-clips to stick the walls together. She used a little of the chewing-gum to stick a little house-sign by the door. She topped it off with a chimney for extra height. We thought hers looked rather like a traditional dolls' house.

Moomintroll used origami sections for his walls (the start of an origami piano). He then connected the walls together using paper-clips. He made the roof using flat sheets of paper laid across the top. He finished it off with a chewing gum and cup tower.


We just had an entire class join us for this one! They did a marvelous job! Big applause to you all!
Check out these houses:
Here is an amazing video from another class that joined us on this one:
click here
If you want to learn more about other cool projects that they have done, go here.
Thursday, March 26, 2009
Week Thirty-One - Houses
Build a house that is at least 9 inches long and 9 inches high using: 1 package of chewing gum, 1 paper cup (if you don't have one handy, just do it without the cup), paperclips, 5 8.5 x. 11 sheets of paper, 3 toothpicks, and 3 bandaids. You may use scissors during construction but not in the solution.
Monday, March 23, 2009
Week Thirty Solutions - Precious Puppets
Boo and Zee at Journey into Unschooling made a video of their puppets! Finding the limited amount of tape to be the biggest challenge, Zee and Boo constructed their puppets out of straws, paper, string, paper clips, and the little bit of tape allowed. Boo rolled his paper up and made a 3D dog, attaching each piece as he finished them. The way in which he attached the legs to the body was interesting -- he first looped one end of the clips onto the body and then stuck the other end into the center of the leg rolls. In other words, the legs were held in place by the paper clip-tension. Zee drew out his design on paper first, before cutting it out and attaching the pieces. He made a person whose head and limps were woven together using paperclips. Be sure to watch their video; it's magnificent!
Snufkin decided to make a robot because she had lots of nice silver paper left over from Christmas. She made a box out of the silver paper and joined it together with little paper bolts. She made a box head; attached jointed limbs on with the paper clips; attached string to the limbs and attached these strings to a marionette-style t-shaped bar. Check out her video here.


Snufkin decided to make a robot because she had lots of nice silver paper left over from Christmas. She made a box out of the silver paper and joined it together with little paper bolts. She made a box head; attached jointed limbs on with the paper clips; attached string to the limbs and attached these strings to a marionette-style t-shaped bar. Check out her video here.


Thursday, March 19, 2009
Week Thirty -- Puppets
Using the following materials, design a puppet that moves in at least two different ways. It may NOT be a hand puppet.
6 straws or pencils
a 12 x 12 square of aluminum foil
6 paper clips
6 inches of tape
paper
string
You may use scissors in construction but not in the solution.
When you are done, check out this.
6 straws or pencils
a 12 x 12 square of aluminum foil
6 paper clips
6 inches of tape
paper
string
You may use scissors in construction but not in the solution.
When you are done, check out this.
Tuesday, March 17, 2009
Cool Crazy Cantilevers -- Week Twenty-Nine Solutions
Jake built a canteliever 45 inches from the counter edge. He used a 1/4 of a packet of spaghetti and a 1/4 of a roll of tape. Cool!

Boo and Zee also joined the fun. Using spaghetti and tape, they constructed cantilevers that were only supported by one end of the dining table. Zee immediately made a bundle of spaghetti "for strength". Their cantilevers were 36 and 27 inches! Magnificent. You can read more about it here.


Moomintroll and Snufkin also created some creative cantilevers! Tremendous. Moomintroll simply taped some spaghetti together as long as it could support itself and then taped one end directly to the table. It could support a roll of sellotape, although as the roll was moved along away from the table, the cantilever was less able to support it.

Snufkin constructed hers with tape supports rather like those on a suspension bridge. Hers was also able to support a roll of tape and extend slightly further.

The Leingangs joined late on this one but did an incredible job -- theirs held a full box of cereal!:


Thursday, March 12, 2009
Week Twenty-Nine -- Crazy Cantilevers
Put a box of spaghetti and a roll of scotch tape on the table and tell your students to construct a cantilever that extends as far as possible. The structure must be attached to the top of the table and may not be attached to anything else. Measure the length of the cantilever and send in your pictures! If you want this to be even more challenging, build the longest cantilever that can support a box of cereal.
To learn more about cantilevers, go here.
To learn more about cantilevers, go here.
Monday, March 9, 2009
Nail Structure Solutions
Harrison did a marvelous job with this open-ended challenge. Check out his suspension contraption! Congratulations on your clever solution!

Moomintroll and Snufkin joined us again for this challenge and, as usual, they both did a tremendous job thinking outside of the box! Snufkin concentrated on getting as many straws off the ground as possible. She built a very long platform and pushed the nails through the straws. She then managed to balanced the remainder of 221 straws (4 were used for Daddy's birthday) on top of her construction. Moomintroll made three base tripods using a combination of nails and straws (no tape). Here he is considering his structure so far. He then created a freeform structure on top of his base and reached great heights (and widths). Neither of the children used the tape. Amazing what you can build with a little creativity! See more pics here.


Moomintroll and Snufkin joined us again for this challenge and, as usual, they both did a tremendous job thinking outside of the box! Snufkin concentrated on getting as many straws off the ground as possible. She built a very long platform and pushed the nails through the straws. She then managed to balanced the remainder of 221 straws (4 were used for Daddy's birthday) on top of her construction. Moomintroll made three base tripods using a combination of nails and straws (no tape). Here he is considering his structure so far. He then created a freeform structure on top of his base and reached great heights (and widths). Neither of the children used the tape. Amazing what you can build with a little creativity! See more pics here.


Thursday, March 5, 2009
Week Twenty-Eight -- Nails
You will need lots of straws, 5 inches of tape and 15 3-inch nails.
Build a structure with your nails that will hold as many straws as possible and as high off the table as possible. You may not use the tape on the straws!
Build a structure with your nails that will hold as many straws as possible and as high off the table as possible. You may not use the tape on the straws!
Tuesday, March 3, 2009
Tremedous Tool Bridges
Zee did an amazing job with his tool bridge. You can read more about it here.


Here are Ross (10yo), Sadie (8yo), and Marcy (6yo) with their bridge. Ross designed and executed the concept.His sisters were the helpers! They did a magnificent job! Glad to have you join us! Hope to see you again.
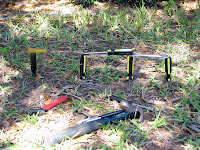

Gryphon did a great job with his tool bridge. He made his using a wooden sword and ratchet pieces among some other tools. He should be proud!


Subscribe to:
Posts (Atom)